How to Build a Marble Run: Engineering Lessons in Motion & Gravity
We may earn a commission for purchases made using our links. Please see our disclosure to learn more.
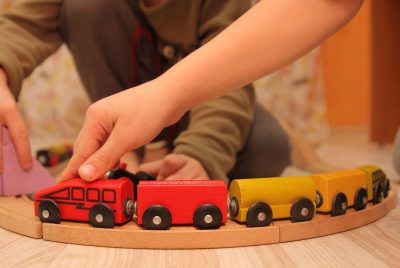
You know that feeling when a simple idea snowballs into a “whoa—did we just build that?” moment? That’s a marble run in a nutshell. It’s part art, part engineering, and 100% satisfying. If you’ve ever wished for a hands-on way to teach (or learn) gravity, momentum, friction, and design thinking—without turning the room into a science lab—this guide is your friendly blueprint.
You’ll learn how to build a marble run step-by-step, level it up with clever add-ons, avoid the common pitfalls, and even choose the right kit if you want pro-grade parts. Along the way, we’ll pull in research, mini challenges, and culturally diverse ideas so everyone—parents, teachers, homeschoolers, makers, and curious kids—can jump in with confidence. Yes, we’ll also cover top Amazon kit recommendations and how to compare them like an engineer.
What You’ll Learn (and Why It Matters)
- How to build a DIY marble run with everyday materials
- The engineering cycle: plan → build → test → iterate
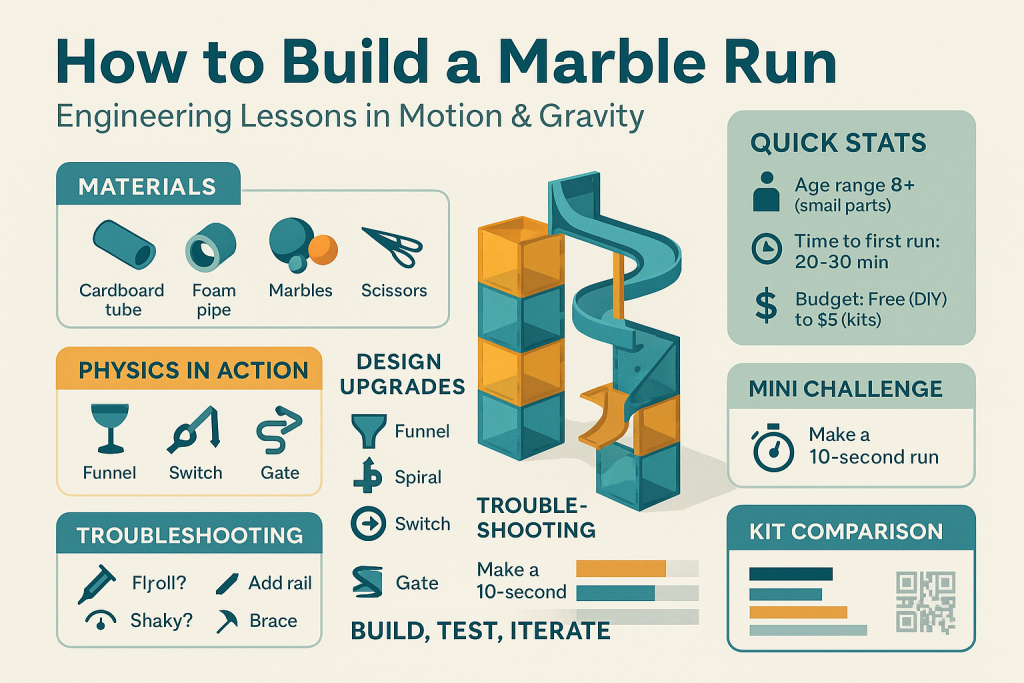
- Physics in plain language: gravity, slope, kinetic energy, friction
- How to troubleshoot wobbles, stalls, and runaway marbles
- The best marble run kits (with features, pros/cons, and quick reviews)
- Evidence that marble runs actually help learners grasp STEM ideas (not just hype)
Materials: From Recyclables to Pro Kits
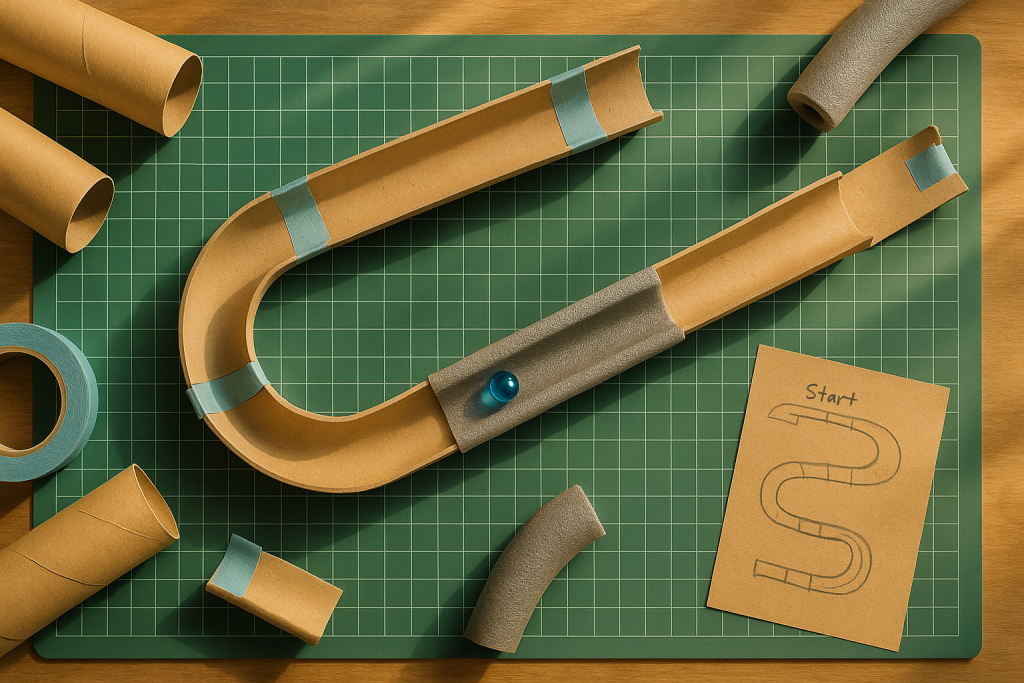
DIY basics: cardboard tubes (paper towel or foil), cereal boxes, chopsticks or coffee stirrers for rails, painter’s or masking tape, scissors/utility knife (adult use), a base board (poster board or a large piece of cardboard), and of course marbles.
Upgrade options: foam pipe insulation (split as half-pipes), plastic gutters, wooden dowels, zip ties, binder clips, and reusable mounting putty.
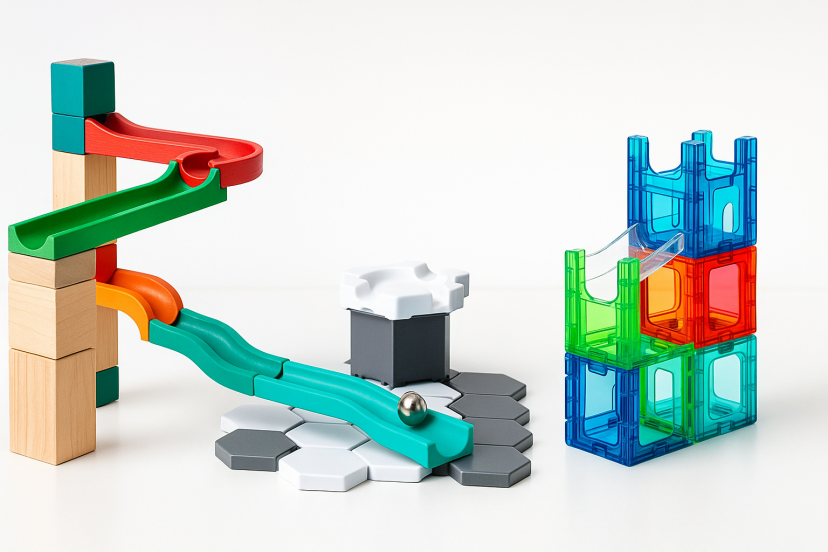
Kits: If you want precision pieces and modular complexity, modern marble run systems (e.g., GraviTrax, Quadrilla, Q-BA-MAZE, PicassoTiles, National Geographic) add stability and expansion paths. They’re designed specifically for hands-on, open-ended “marble machine” tinkering.
Safety First: Age, Choking Hazards & Workspace
- Ages & small parts: Many kits are best for 8+ due to small pieces and complexity (for example, GraviTrax lists age 8+, and National Geographic’s glow-in-the-dark marble run also recommends 8+).
- Younger builders: Look for junior versions or supervise with larger track pieces and bigger “marbles.”
- Set up: Use a flat table or the floor near a wall. Keep scissors/knives for adults and store marbles away from toddlers.
The Engineering Mindset: Plan → Build → Test → Iterate
Before taping anything, sketch the big idea: Start, drop, curves, switch, final catch. Then:
- Plan: What’s your start height? Where will the marble finish?
- Build: Attach two or three simple track sections first.
- Test: Roll one marble—watch carefully.
- Iterate: Tweak slope, realign joints, stabilize supports.
- Reflect: What changed the speed most—slope, surface, or curves?
This simple loop mirrors how real engineers work: design constraints, prototypes, test data, and improvements—minus the lab coats.
Step-by-Step: How to Build a Marble Run (DIY)
Step 1: Base & supports
- Tape a large poster board to the wall or prop a cardboard sheet vertically.
- Create pillars by rolling scrap cardboard into tubes; tape them upright.
Step 2: Tracks
- Cut cardboard tubes in half for U-shaped channels.
- Angle the first track slightly (start small—about a 10–15° slope).
- Overlap ends by at least 1–2 cm so marbles can’t catch on edges.
Step 3: Connectors & transitions
- Use a small funnel (paper cone or a cup with a hole) after big drops.
- For switches, make a “Y” junction from a box corner or two half-tubes.
Step 4: Catch & reset
- End with a bowl, shoebox lid, or soft towel.
- Add a return chute if you want marbles to roll back to the start.
Mini challenge: Build a run that takes exactly 10 seconds from release to finish. Adjust slope until your timing is consistent.
Design Principles: Gravity, Slope & Speed
- Gravity is the engine. Your height is “stored energy.” Higher start = more potential energy → more speed later.
- Slope controls pacing. Too steep = fast but chaotic. Too shallow = stalls.
- Friction is real. Rough cardboard slows marbles. Smooth plastic or wood is faster.
- Curves disperse energy. Use them to prevent marbles from flying off.
Try it: Build two parallel lanes—one steep/short, one gentle/long. Which wins?
Obstacles, Switches & Chain Reactions
- Bumpers (erasers, corks) make satisfying zigzags.
- Spirals & helixes extend time on track.
- Gates & levers let one marble trigger another (hello, Rube Goldberg).
- Crossovers (bridges or transparent sections) add drama without collisions.
- Elevators or lifts (in advanced kits) reset marbles for continuous play.
Troubleshooting: Why Do Marbles Stall or Fly Off?
- Stall at a joint? Increase slope slightly or sand the edge.
- Jumping the track? Add a low “rail” lip or reduce slope entering curves.
- Shaky supports? Double-tube your pillars and add diagonal braces.
- Too fast too soon? Insert a friction zone—a felt pad, sandpaper strip, or a gentle S-curve.
Mindset tip: “If it failed, you learned.” Engineers love good data—even when it’s a miss.
Level Up by Age & Skill
- Ages 4–6 (with help): Big funnels, wide tracks, soft slopes, color sorting games.
- Ages 7–9: Timed races, simple switches, “reach the target cup” challenges.
- Ages 10–12: Multi-level towers, spiral drops, splitters that recombine.
- Teens & adults: Chain reactions across furniture, programmable tiles, or power modules that launch marbles mid-run.
Classroom & Group Ideas (Global & Inclusive)
- Team roles: designer, builder, tester, documentarian (photos/notes).
- Budget builds: reuse cereal boxes and tubes—accessible in most communities from Manila to Manchester.
- Cultural connections: name sections after local landmarks (“Chocolate Hills Drop,” “Table Mountain Spiral”) to spark pride and storytelling.
- Math across systems: measure in cm and inches; compare outcomes.
- Language practice: have students narrate their design process in their home language and in English—great for multilingual classrooms.
Product Picks: Best Marble Run Kits (Amazon Affiliate)
Below are well-loved kits that bring reliability and depth to your builds. Summaries include standout features, ideal users, and quick pros/cons so you can match a kit to your goals.
1) Ravensburger GraviTrax Starter (and PRO/Power families)
Why it’s great: A modular system focused on physics experimentation—add expansions for magnetics, switches, jumps, and even powered modules. Recommended 8+.
Best for: Builders who want to iterate like engineers and keep expanding.
Highlights
- Precision hex tiles & tracks; tons of add-ons (PRO verticals, Power electronics)
- Designed for gravity, magnetism, and kinetics exploration
- Stable layout with clear upgrade path
Pros
- Super expandable ecosystem
- Encourages real experimentation & redesign
Cons
- Small parts (8+); expansions add cost
2) Hape Quadrilla Cyclone (Wooden)
Why it’s great: Heirloom-quality wood tracks and blocks for durable, tactile builds; non-toxic finishes and FSC-sourced wood. Ages 4+.
Best for: Families and classrooms that love the look and feel of wood and want stability over sheer speed.
Highlights
- Solid wood construction; color-coded blocks control flow
- Durable pieces that hold alignment well
Pros
- Beautiful, sturdy, long-lasting
- Calmer, more controlled runs
Cons
- Heavier; fewer “trick” pieces than plastic systems
3) MindWare Q-BA-MAZE 2.0 (Stunt/Super Race Sets)
Why it’s great: Cube-based architecture lets you build art sculptures that also function as mazes; ABS plastic (phthalate & BPA-free). Ages 6+.
Best for: Visual thinkers who want aesthetically striking, gravity-fed towers.
Highlights
- Unique cube geometry (build animals, letters, or abstract shapes)
- Add-on stunt pieces: vortex, rails, turbo launcher
Pros
- Creative freedom; looks fantastic on display
- Good balance of art + engineering
Cons
- Cubes can come apart if towers are bumped—build wide bases
4) PicassoTiles Magnetic Marble Run (200-pc)
Why it’s great: Combines magnetic tiles with tubes/ramps—great for younger builders under guidance; optional LED marbles add sparkle.
Best for: Early learners and families who already love magnetic tile play.
Highlights
- Magnetic walls form sturdy enclosures; colorful translucent ramps
- Encourages spatial reasoning and shape recognition
Pros
- High visual appeal; simple to start
- Works on metal boards or flat floors
Cons
- Magnets can shift if towers get tall—reinforce corners
5) National Geographic Glow-in-the-Dark Marble Run
Why it’s great: Glow marbles + UV light = night-racing joy; snug-fit tubes and action pieces; recommended 8+.
Best for: Builders who want high-contrast, glow-party STEM sessions or dark-room demos.
Highlights
- UV light charges marbles; storage bag included in many sets
- Compact parts for tight builds and easy storage
Pros
- Big “wow” factor in low light
- Straightforward assembly
Cons
- Smaller piece count than large ecosystems; fewer advanced tricks
Side-by-Side Comparison Table
Notes: Exact piece counts vary by configuration/new releases.
Build Like a Physicist: Quick Exercises
- Friction test: Line one track with paper, one with tape—time both. Which is faster and why?
- Potential energy swap: Lower the start height but add a steeper mid-section. Does total time change?
- Energy loss: Add one extra curve and measure the finish speed. What’s the trade-off for style?
Storytelling Meets STEM
Make it personal and local:
- In a small apartment, go vertical on a door with painter’s tape and foam tracks.
- In a classroom, turn it into a relay of nations—each group names their segment after a city and explains a design choice in two languages.
- In community centers, invite families to bring recyclable materials common in their region—cardboard sari-sari boxes, tea tins, chopsticks, yogurt cups—and build a “global” run.
🧪 Research-Backed: Why Marble Runs Teach Real Engineering
Hands-on “marble machine” tinkering is a classic design-learning experience: learners explore variables, test hypotheses, and “think with their hands”—exactly the kind of iterative problem-solving engineers use. Activity guides from the Exploratorium’s Tinkering Studio highlight how open-ended materials help learners complexify their thinking over time and construct understanding through personally meaningful builds.
More broadly, studies on physical manipulatives (e.g., friction/statics) show that concrete tools make abstract science concepts easier to grasp—especially when topics like friction or energy feel counterintuitive.
Want a direct physics tie-in? Gravitational potential energy (height → stored energy) and its conversion to kinetic energy (motion) are central to marble runs and commonly taught with interactive surfaces and representations in physics education research. OSU Physics Education Research Group
FAQs
How steep should my marble run be?
Start shallow (about 10–15°) and test. Increase slope where marbles stall; soften slope before sharp curves to prevent fly-offs.
What’s the best surface for speed?
Smooth plastic or wood is typically faster than rough cardboard because it reduces friction. Use felt/paper strips to slow sections deliberately.
How do I keep tall towers from wobbling?
Wider bases, triangular bracing, and shorter segments between supports. In kits, use extra base plates or cross-braces.
Which kit should I buy for a classroom?
If you want expandability and physics “tricks,” pick GraviTrax. For durability and tactile wood, pick Quadrilla. For younger learners or magnetic tile fans, choose PicassoTiles.
Is a marble run really teaching STEM—or just play?
It’s both. Students apply the engineering cycle and test variables (slope, friction, energy). This kind of tinkering is widely used by museums and educators because it develops authentic problem-solving.
Keep Learning: STEM for Early Builders
For more beginner-friendly ideas, explore this age-appropriate guide to STEM toys for kindergarteners—perfect if you’re building curiosity from the ground up: STEM toys for kindergarteners
Conclusion
A marble run is a rare kind of project: it welcomes every builder, rewards curiosity, and turns invisible physics into something you can see, hear, and tweak. Start with recyclables or pick a kit that matches your goals. Plan a simple drop, test your slope, iterate without fear, and celebrate every tiny improvement. Along the way, you’ll find the real lesson isn’t just gravity or momentum—it’s the confidence to design, test, and build again. That’s the kind of energy we want rolling through every home and classroom.