Stem Activity: Make Your Own Robot Hand
We may earn a commission for purchases made using our links. Please see our disclosure to learn more.
Ever watched a kid (or… okay, you) pick something up and thought, “How does my hand do that so effortlessly?” Then you try a simple craft—and suddenly your fingers feel like they forgot their job. 😅
That little “wait… HOW?” moment is exactly why a Robot Hand project is so fun. It turns an everyday body movement into a hands-on engineering win you can actually build, test, tweak, and brag about.
You’re about to learn how to make a moving Robot Hand using simple materials (cardboard + straws + string), how the “tendons” work, how to troubleshoot the inevitable “why is this finger being dramatic?” problem, and how to level it up for older kids, classrooms, or curious adults.
Affiliate note: This article includes a few Amazon product recommendations that may earn a small commission at no extra cost to you.
Why a Robot Hand Is the Perfect “I Can’t Believe I Made That” STEM Project
A Robot Hand hits that sweet spot: it’s simple enough to start today, but deep enough to spark real learning.
You’re not just crafting—you’re experimenting.
- You build a model of hand biomechanics
- You simulate a tendon-and-joint system
- You practice the engineering design process (build → test → improve)
And the best part? When it works, it feels like magic… but it’s really just smart design.
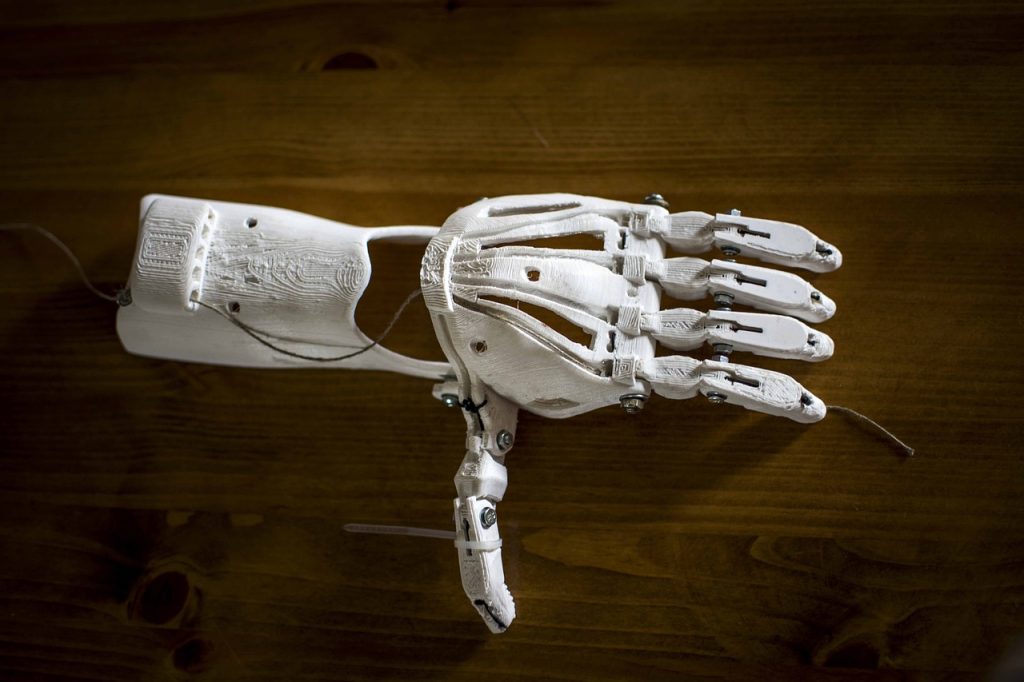
What You’ll Build: A Cardboard Robot Hand That Moves Like Yours
This DIY Robot Hand is basically a cardboard “skeleton” with string “tendons.”
Pull the strings, and the fingers curl.
Let go, and they relax (with help from the cardboard’s bend or a simple return method like rubber bands—more on that soon).
It won’t crush a soda can or type an email (yet). But it will grab light objects like:
- cotton balls
- paper clips
- small foam pieces
- a folded note that says “I am an inventor now”
How a Robot Hand Works (In Plain English)
The simple model
Your real hand uses bones, joints, tendons, and muscles. Your Robot Hand copies the idea:
- Cardboard = bones (structure)
- Fold lines = joints (where bending happens)
- String = tendons (pull forces)
- Your hand = the “muscle” that pulls the tendons
When you pull the string, it creates tension. That tension forces the finger segments to bend at the joint lines.
The “aha” moment
If you place the joint lines wrong, the finger bends weird.
That’s not failure—that’s engineering feedback.
Materials List: What You Need (Cheap, Easy, Mostly in Your Junk Drawer)
Here’s the basic build list:
- Cardboard (cereal box works; thicker cardboard lasts longer)
- 5–10 drinking straws (or coffee stirrers)
- String / yarn / fishing line
- Tape or glue
- Scissors
- Marker or pen
- Optional: rubber bands, craft knife (adult use), ruler
Pro tip: If you’re doing this with kids, pre-cutting the cardboard hand outline saves a lot of “why are you chewing the scissors?” moments.

Safety + Setup: Make It Fun, Not Stressful
Quick safety checklist
- Use kid-safe scissors when possible
- If you use a craft knife, make it adult-only
- Hot glue? Totally helpful—but keep it supervised
Set the vibe
This project goes smoother when it feels like play, not a test.
I like saying:
“We’re not aiming for perfect. We’re aiming for working.”
That one sentence removes so much pressure.
Step-by-Step: Trace, Cut, and Build the Hand Base
Step 1: Trace a hand
Place your hand on cardboard and trace around it.
Make the fingers slightly wider than real life. Cardboard needs room to bend.
Step 2: Cut it out
Cut the hand shape carefully.
Step 3: Mark finger joints
On each finger, mark two joint lines:
- one near the middle (like your knuckle area)
- one closer to the fingertip
Don’t overthink the exact anatomy. You just need bending points.
Step-by-Step: Add “Bones” and Finger Joints
Step 4: Create joint folds
Lightly score (not cut through) the joint lines so the finger bends there.
If you’re not scoring, you can also:
- fold gently back and forth a few times
- or cut tiny V-notches on the sides (older kids + adult help)
Step 5: Add straw “guides”
Cut straws into small segments (about 1 inch each).
Tape or glue 2–3 straw pieces along each finger in a straight line.
These act like little tunnels so your “tendons” don’t wander off like lost shoelaces.
Step-by-Step: Thread the Tendons (Strings) for Movement
Step 6: Attach string to each fingertip
Tape the end of a string near the fingertip on the palm side.
Step 7: Thread through straw tunnels
Run the string down through the straw pieces toward the wrist area.
Repeat for each finger.
Helpful note: If string is too fuzzy, it can snag. Fishing line or smooth cord glides better.
Step-by-Step: Make the Wrist Pull and Test Your First Grip
Step 8: Create a “pull tab” zone
At the bottom of the cardboard hand (near the wrist), gather all strings.
You can:
- tape each string end onto a small cardboard strip (easy for little hands)
- or tie loops on each string (easy for finger pulls)
Step 9: Test it
Pull one string slowly.
Does that finger curl?
If yes—celebrate loudly. I don’t make the rules. 🎉
If no—welcome to the engineering club. Keep reading.
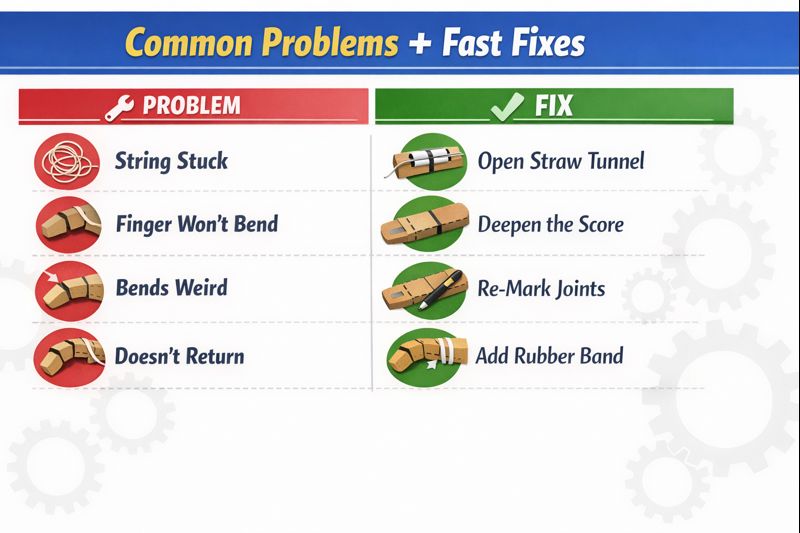
Troubleshooting: When Fingers Won’t Bend (and Other Tiny Drama)
Here are the most common Robot Hand issues (and quick fixes):
“The finger won’t bend at all.”
- Your joint line might be too stiff
Fix: score/fold it more so it hinges easier
“The string gets stuck.”
- Straw tunnels may be squished
Fix: re-tape them with a tiny gap underneath
“The finger bends in a weird place.”
- Joint line placement is off
Fix: redraw joints and re-score
“It bends, but doesn’t return.”
- Cardboard sometimes stays bent
Fix: add a small rubber band on the back side as a “return” helper
“The hand curls but can’t grip.”
- Fingers may be too short or too floppy
Fix: use thicker cardboard or add a second layer
Level Up Ideas: Make It Stronger, Smoother, and More “Robot”
If you want your Robot Hand to feel more “real,” try these upgrades:
Add a palm brace
Glue a second cardboard layer to the palm only. Keep fingers single-layer for flexibility.
Add “knuckles”
Tape small folded cardboard squares at joints to guide bending.
Build a wrist cuff
Create a cardboard sleeve so you can “wear” the Robot Hand.
Make it a challenge
Try a “grip test” with lightweight objects:
- cotton ball
- sponge cube
- plastic bottle cap
Track improvements like a real prototype log.
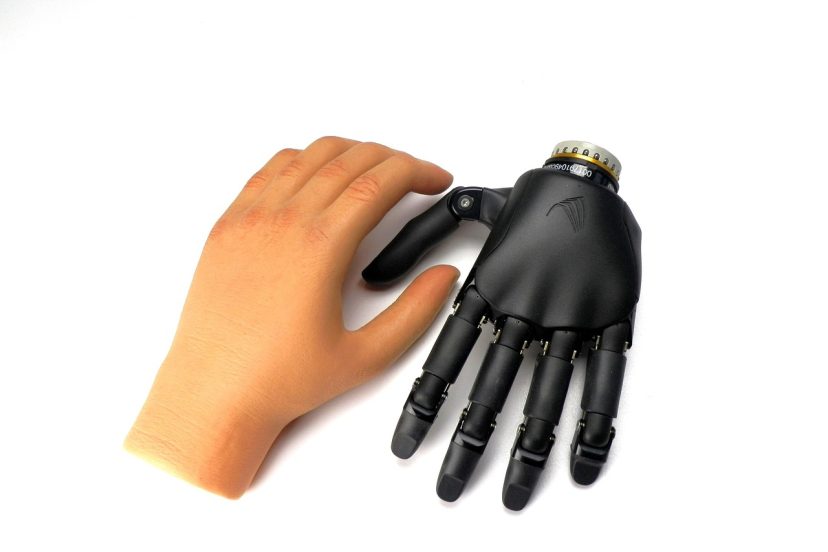
Real-World Connection: Prosthetics, Assistive Tech, and Empathy Engineering
This is where the Robot Hand gets quietly powerful.
A lot of modern prosthetic and assistive devices rely on:
- tendon-like cable systems
- joint mechanics
- lightweight materials
- user-centered design
You can turn this into a meaningful reflection moment:
- “What would make this easier for someone with limited grip strength?”
- “How could we redesign the pull system for one-handed use?”
- “What materials would be comfortable on skin?”
That’s not just STEM. That’s human-centered engineering.
Classroom + Home Variations: Ages 5–7, 8–12, Teens, and Adults
Ages 5–7 (with help)
Keep it simple:
- pre-cut hand
- tape-only build
- pull tabs instead of individual finger control
Ages 8–12
This is the sweet spot:
- independent build
- joint scoring practice
- testing and redesign
Teens
Add constraints:
- build with a limited budget
- design for a specific task (pick up a marker, hold a cup)
Adults (yes, you too)
Turn it into a maker-night project:
- stronger materials
- cleaner mechanics
- a mini write-up like a prototype pitch
Because honestly? Adults deserve fun learning too.
Product Picks: Tools & Kits That Make This Robot Hand Easier
Before the Amazon list: if you’re building STEM habits for younger kids, this roundup of toddler-friendly learning toys that build early problem-solving skills is a great companion resource.
Now—here are five Amazon picks that fit this Robot Hand project (and the “low regret” criteria).
1) Smartivity DIY Robotic Mechanical Hand STEM Toy
Short description: A buildable mechanical hand kit that leans into the same tendon-style concept—just more polished and gift-ready.
Features:
- Mechanical hand build with guided steps
- Designed for ages 8–14
- Strong “build → play → learn” loop
Use cases (who it’s for):
- Parents who want a clean STEM gift
- Teachers needing a structured kit day
- Kids who love hands-on engineering projects
2) Thames & Kosmos Mega Cyborg Hand STEM Experiment Kit
Short description: A “bigger” cyborg-hand kit that’s great when you want the wow-factor without reinventing the whole build.
Features:
- Experiment-style build approach
- More complex mechanics than cardboard
- Good for repeat builds and challenges
Use cases (who it’s for):
- STEM clubs
- Older kids who want a tougher build
- Families who like weekend build projects
3) 4M KidzRobotix – Motorized Robot Hand
Short description: A motorized twist if your crew wants “robot” to mean moving parts with a little extra flash.
Features:
- Motorized motion (less manual pulling)
- Robotics + anatomy theme
- Built to feel like a “real kit”
Use cases (who it’s for):
- Kids who love gadgets and mechanisms
- Gift-givers who want a STEM win
- Robotics-curious beginners
4) Gorilla Hot Glue Sticks (Mini Size)
Short description: Strong glue sticks make straw tunnels and reinforcement layers stay put—especially if your Robot Hand gets used (a lot).
Features:
- Works in high/low temp mini glue guns
- Reliable hold for cardboard + plastic
- Great for quick repairs mid-build
Use cases (who it’s for):
- Teachers doing multiple builds
- Parents who want less “tape failure”
- Anyone upgrading to a sturdier prototype
5) Berkley Trilene Big Game Monofilament Fishing Line
Short description: This is the secret upgrade for smoother tendon pulls. It slides through straw tunnels like it was made for it.
Features:
- Smooth pull (less snag than fuzzy string)
- Strong and thin for clean routing
- Useful for tons of maker projects
Use cases (who it’s for):
- Anyone frustrated by stuck strings
- Teens building “cleaner” mechanisms
- Makers who want a more professional feel
Research-Backed Credibility + FAQs About Robot Hand Projects
What research says (the helpful, not preachy version)
Hands-on builds like a Robot Hand work because they force you to do the thinking, not just watch it.
In a major STEM education meta-analysis, Freeman et al. (2014) reviewed 225 studies and found that active learning improves performance compared with lecture-based approaches. That lines up with what you see in real time during this build: when you test, fail, and tweak, your brain locks the lesson in place.
Source: active learning research that supports hands-on STEM builds
Also, if you’re specifically thinking “robotics = better learning,” a meta-analysis by Wang et al. (2023) found educational robots had a moderate, statistically significant positive effect on learning outcomes (reported effect size g = 0.57). In other words: robots aren’t just fun props—they can support real learning when the activity is designed well.
Source: educational robot research on learning outcomes
FAQs (long-tail questions people actually search)
How do you make a Robot Hand with cardboard and string?
Trace and cut a cardboard hand, score joint lines to create bends, tape straw segments as guides, then thread string from fingertip to wrist. Pull the string to curl each finger.
What’s the easiest Robot Hand STEM activity for beginners?
Use a cereal-box cardboard hand, tape-only straw guides, and yarn. Skip rubber bands at first. Focus on making one finger move cleanly—then repeat.
Why won’t my cardboard robotic hand fingers bend correctly?
Usually it’s joint placement or stiffness. Deepen the score line, check that straw guides are aligned, and make sure the string pulls in a straight path.
What age is a DIY robot hand project best for?
Ages 8–12 tend to thrive with this project. Ages 5–7 can do it with pre-cut pieces and pull tabs. Teens can level up with constraints and redesign goals.
How can I improve grip strength on a homemade Robot Hand?
Use thicker cardboard for the palm, keep fingers flexible, and switch to smoother “tendon” material (like fishing line). Add rubber bands on the back for better return motion.
Conclusion
A Robot Hand project isn’t just a craft. It’s a mini engineering journey you can hold in your hands—literally. You build a model, you test it, you tweak it, and you watch the idea come alive. And along the way, you’re teaching your brain (and any kids nearby) a quiet truth: you can figure things out by making things.
If you try it, take a photo of your first “working-ish” version. That’s not the warm-up. That’s the win. 🙂